Create an account
It all starts with the Webself.net homepage: click on Create your website or Sign up.
You can either enter your name, email and password, or use a social media. Once your account is created, you will receive an email confirming your registration.
 Sign in to your account
To return to edit your website, go to www.webself.net and click on “sign in” ( on the top right, and next to Sign up). Then use the same information as when you registered: email and password, Facebook, or Google.
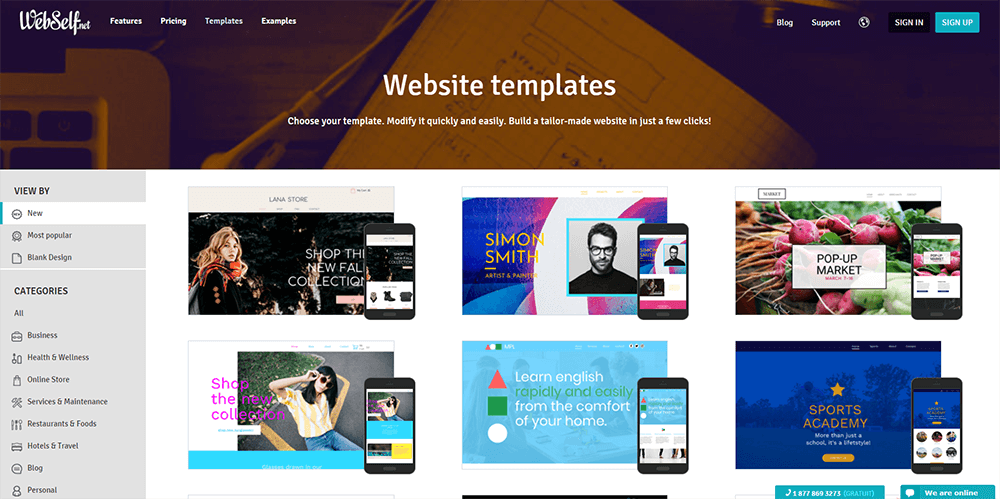
Choose a design or start with a blank theme
Once your account is created, you arrive at the themes page. Webself offers hundreds of customizable themes to help you create your website. You can explore the various categories of website and choose a theme whose content is very similar to the content you have for your website, or a theme whose style looks like what you want. Our Designers work hard for you to make the least changes to your theme, then you have the advantage to choose a theme that fits your field of activity, and modify only the necessary. To view the themes before choosing, click on “view” , and once your choice is done, click on the “choose” button of the selected them.
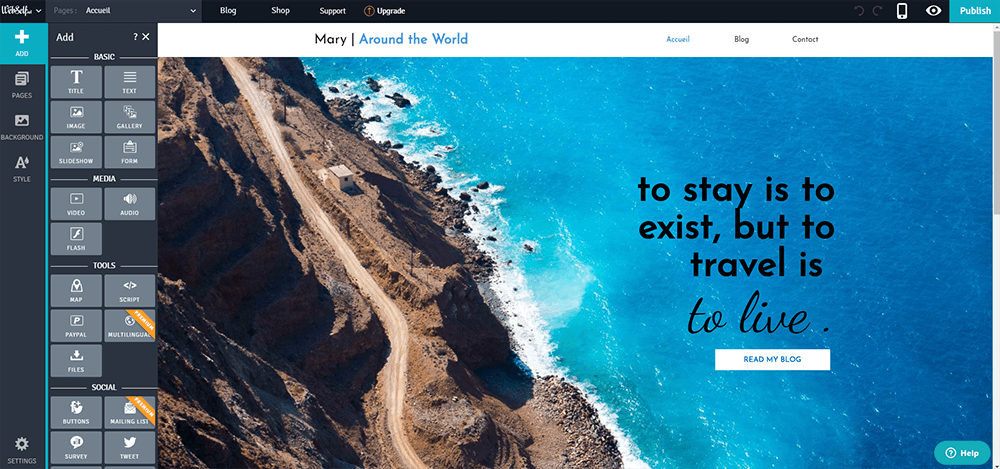 Webself Editor
Once your theme is selected, you enter the Webself editor.
You will find the horizontal management bar, where there are several features like the blog or e-shop, or even the publishing button of your website. You will also see the vertical management bar, it is located on the left of the screen in the editor. It allows a direct access to the main function of your website configurations. Below you will find a description of the different elements that is on this bar.
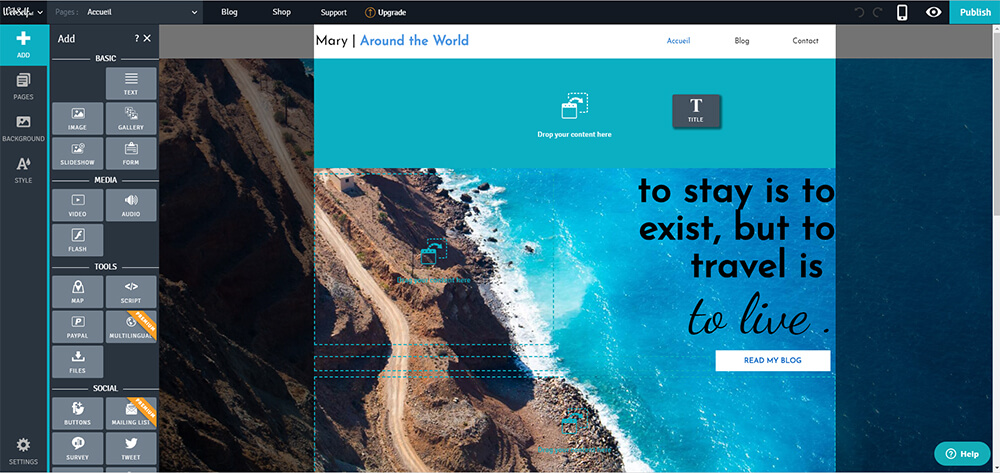
Add: This section allows you to add different contents. Content is an element you add on your website: an image, a form, a map,and so on.
Pages: pages, as indicated by his name, give you access to the management of pages on your website. You can create, delete or simply copy a page to save time.
Background: you can change the backgrounds and colors of different sections of your website (pages , header, content, footer, sections).
Style: Under this tab, style elements of your website are available. You can change the different colors and fonts on the website to customize to the maximum.
 Adding content
To add content to a page.Click the “Add” button on the vertical management bar and select the module you want to add. You can drag and drop the module where you want to add it on your website. Depending on the module you choose, an edit window will open automatically to directly edit the module information.
Editing content
To edit the existing content on the page , make a right click on the module you want to edit. You will see a window containing all the options for the module. To edit a text block for example, right-click on this block, and click on “edit” to edit the text in this module. You can also click on “style” to edit other options like the background of the module or the margins. So go around your Webself theme and edit the necessary information. Enter your texts and edit your images.
Also pay specific attention to the header of your website. To edit it , hover over the section and you will see an orange icon containing a small pencil, click on it to edit your header. Insert your logo and link it to your home page, and go to edit your menu by right clicking and choosing the “ settings “ option.
Pages management
If you noticed in the header pages that not suitable for your website. You can add or delete pages in the “pages” tab in the vertical management bar on your left. In this tab, you can also reorganize the order of your pages as you wish, or edit the page titles.
Website preview
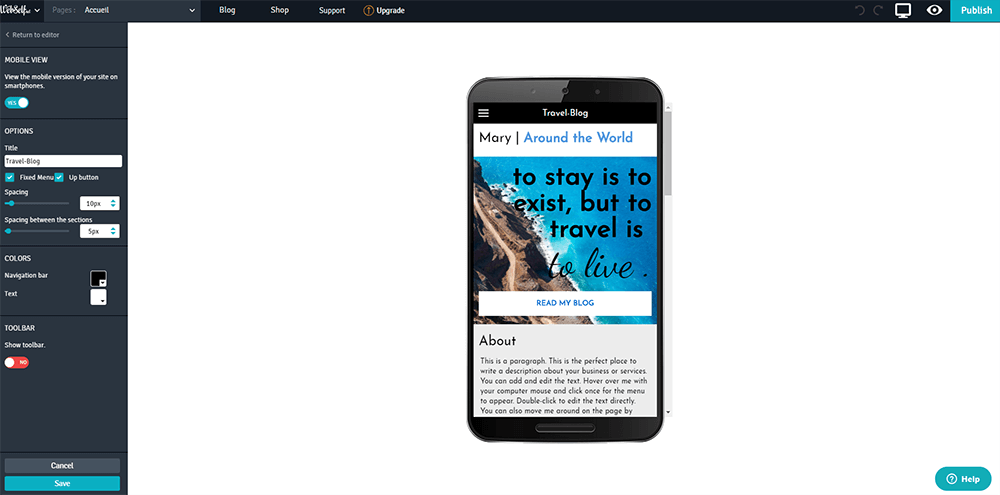
Once your website suits you, you can go to the preview by clicking on the eye icon in the horizontal management bar. Also take a few minutes to check the mobile version of your website. To do this, click on the mobile phone icon on the horizontal management bar. Webself will automatically generate mobile version of your website. You just have to take a quick tour of your pages to rearrange information that does not appear in the right order. Drag and drop the information to rearrange it. You can also adjust the text size by right clicking on the module. Once your mobile website holds, you’re ready to publish!
Publish your website
To publish your website, it’s also very simple! You just have to click on the “Publish” button which is completely at the top right. Your site is now published on the web, do not hesitate to share it on Facebook to all your friends, as well on Twitter!
Create your article is the next step. Start now with Webself, it’s free!